Map tab
The Map tab edits everything in Map.sav, that’s the layout of your island, every tile on the ground and every object placed on top of it. Houses, facilities, fences, lamps, paths, stepping stones, decorations, and the UGC (custom) objects you’ve made all live here. Per-Mii data stays on the Mii tab, the global island state stays on the Player tab.
Once Map.sav is loaded, the tab splits into two sub-tabs: Map (the workbench) and Advanced.
Download Map.sav
Section titled “Download Map.sav”The orange Download Map.sav button at the top of the tab writes a patched copy of your save to your Downloads folder. The editor never overwrites the file on disk, you do that yourself by putting the downloaded file back where you found it.
The button stays greyed out until you’ve made an edit, and lights up the moment something changes. You can keep editing and re-download as many times as you want, each download is the full current state.
The workbench
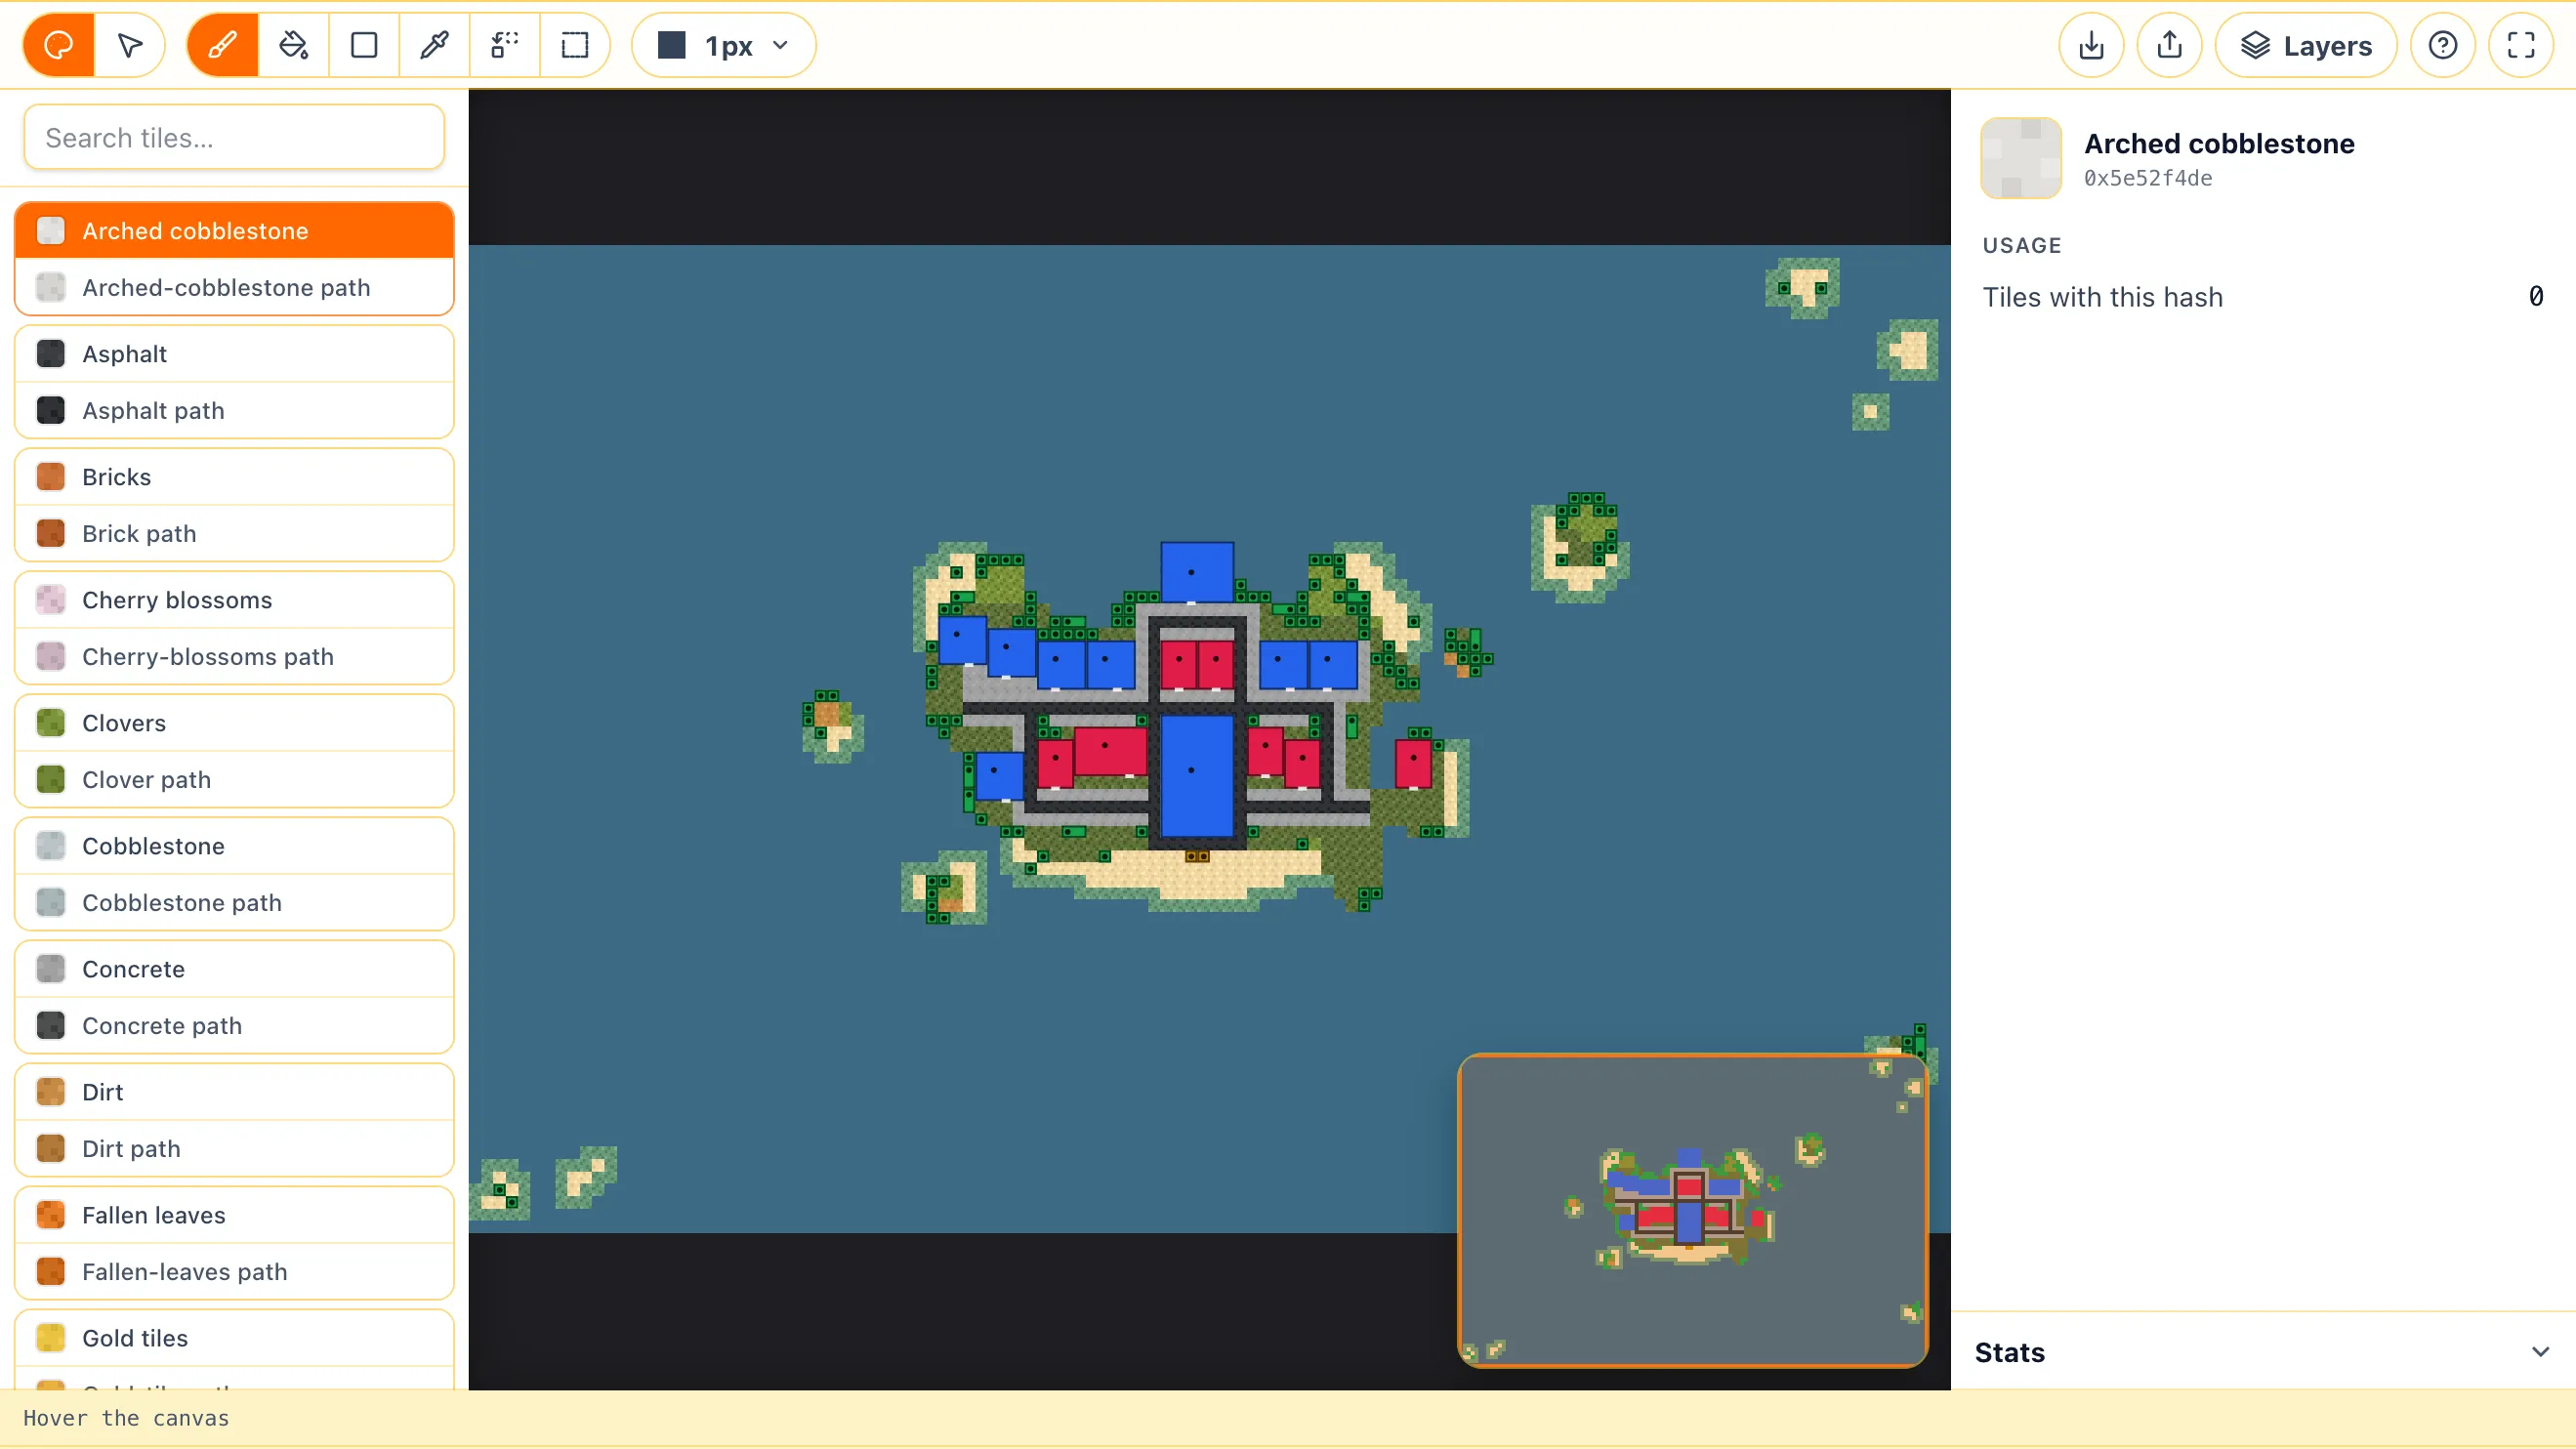
Section titled “The workbench”The Map sub-tab is a full-screen workbench split into five regions: a toolbar across the top, the tile palette on the left, the canvas in the middle, the inspector on the right, and a status bar along the bottom. A small mini-map floats in one of the corners.
The map grid is 120 tiles wide and 80 tall. The fullscreen button on the far right of the toolbar expands the workbench to fill your screen, useful on smaller laptops.
Paint mode and Select mode
Section titled “Paint mode and Select mode”The two pill buttons at the far left of the toolbar switch between the two modes:
- Paint is for editing the ground, every click and drag changes tiles.
- Select is for placing, moving, rotating, linking, and deleting objects on top of the ground.
Most keyboard shortcuts only apply in one mode or the other. The help button in the toolbar opens the full Keyboard shortcuts dialog, also reachable with ?.
Painting the ground
Section titled “Painting the ground”In Paint mode the toolbar exposes six tools:
- Brush paints one tile at a time with a configurable shape and size.
- Fill flood-fills every connected tile of the same hash.
- Rectangle drags out a rectangular region of one tile.
- Picker samples the tile under the cursor into the active selection.
- Replace changes every tile on the map with the same hash to the selected one in a single click.
- Region selects a rectangular tile region for copy, cut, paste, mirror, rotate, or erase.
The tile palette
Section titled “The tile palette”The left rail lists every known floor tile, sorted alphabetically. Each row is a base tile with its matching road variant directly below it, click either swatch to make it the active tile. The Recent strip at the top remembers the last few tiles you used. The search box filters by name or internal code.
Tiles in the save that aren’t in the editor’s known list show up under Unknown at the bottom of the palette with their raw hash.
Brush options
Section titled “Brush options”When the Brush tool is active, the Brush button on the toolbar opens a popover with four controls:
- Size is the brush diameter in tiles,
1to the max. - Shape picks from square, circle, ring, diamond, hex, triangle, cross, heart, 5-point star, 6-point star.
- Mode is Stroke (drag to paint a continuous line) or Stamp (click to place once).
- Rotation rotates the kernel by 0°, 90°, 180°, or 270°.
Tile region tools
Section titled “Tile region tools”When the Region tool is active, an extra row of buttons appears: Copy, Cut, Paste, Flip H, Flip V, Rotate, and Erase. Marquee out a rectangle, copy or cut it to the clipboard, then paste it anywhere on the map. The clipboard can be flipped or rotated before placing. Erase sets every selected tile back to grass.
The standard Cmd+C / Cmd+X / Cmd+V shortcuts work the same way.
Placing and editing objects
Section titled “Placing and editing objects”In Select mode the inspector on the right turns into the object library. Search by name or filter by group (House, Facility, Object, Step, Room, Custom (UGC), or Unknown), then drag a row onto the canvas to place it.
Click an existing object on the canvas to select it, the inspector switches to its detail editor.
Single-object inspector
Section titled “Single-object inspector”- Actor is the object type. The Select all (N) button below selects every other slot using the same actor.
- Position is the grid X / Y in tiles.
- Rotation is one of
0°,90°,180°,270° - UGC content (only for UGC actors) shows the custom object’s name, shape, raw size, scale, and computed footprint. Needs
Player.savloaded, that’s where the UGC dimensions live. - Linked map is the map ID this object points to (for houses, this is the interior the residents live in).
- Duplicate clones the selected object at the same coordinates so you can move the copy elsewhere.
- Delete clears the slot. For a house with residents, the editor first asks whether to evict the residents or delete the house only.
Multi-select inspector
Section titled “Multi-select inspector”Drag a marquee in Select mode, or Shift+click to add to the selection, the inspector switches to a multi-edit panel. It shows a per-group breakdown, a Link all to map field that retargets every selected object’s linked map at once, and a Delete all action.
Houses and residents
Section titled “Houses and residents”When the selected object is a house, the inspector shows a Residents panel listing every Mii currently assigned to it, with controls to move them between rooms, evict, or pick a new resident from the islanders. Residents need Mii.sav loaded.
A Single Room house has an Upgrade to Doll House button (8 rooms, needs free space next to it). A Doll House has the matching Downgrade, which keeps the lowest-room resident and evicts the rest.
Layers
Section titled “Layers”The Layers button on the right of the toolbar opens a popover with one row per overlay. Each row has a visibility checkbox and an opacity slider:
- Floor, Objects, Fences, UGC are the four content layers.
- Changes highlights every tile that’s been modified since the save was loaded, with a counter showing how many tiles differ.
- Grid overlays the tile grid on the canvas.
- Island tier outlines the unlocked tier border.
- Brush preview is the brush shadow shown under the cursor in Paint mode.
- Mini-map at the bottom toggles the floating mini-map on or off.
The status bar
Section titled “The status bar”Hover the canvas and the bar at the bottom shows:
- X / Y of the tile under the cursor.
- The tile name (or hex hash for unknown tiles).
- Collision · N objects overlap here in red when more than one object occupies the same cell.
- Modified · was X, now Y in orange when the Changes layer is on and the tile under the cursor differs from the original.
A * in the bar marks unsaved changes. Selection counts (objects and tiles) appear on the right.
Stats panel
Section titled “Stats panel”The Stats panel folds out of the bottom of the inspector when nothing is selected. It groups three things:
- Tile coverage is one bar per tile hash with the percentage of the map it covers. Click a row to snap the canvas to that type of tile.
- Objects counts each group (House, Facility, Object, Step, Room, UGC, Unknown) plus the number of free slots out of the total.
- Residents (only when
Mii.savis loaded) shows total Miis, how many are housed, and the Unhoused islanders. Click an unhoused name to assign them to an empty room.
A separate Issues section flags problems that may corrupt the save or behave oddly in-game: out-of-bounds objects, overlap clusters, unknown actor hashes, unknown tile hashes, empty houses, under-filled Doll Houses. Each row snaps the canvas to the offending cells.
Cmd+F opens the Find palette at the top of the canvas. Type to filter, the inspector turns into a results list. The query supports prefixes:
tile:grassmatches tiles by name.actor:lampmatches objects by name.unknown:filters to unknown hashes only.ugc:filters to UGC.
Enter snaps the canvas to the next match, Cmd+click selects the match.
Sharing maps
Section titled “Sharing maps”The two icons next to the Layers button are the share controls.
Export shared map (.ltdmap)
Section titled “Export shared map (.ltdmap)”The upload-style icon opens Share map, a dialog that exports your floor tiles (and optionally your decorative objects) into a .ltdmap file you can hand to anyone else. UGC tiles export as grass, houses, facilities, and UGC objects are never included.
Import shared map
Section titled “Import shared map”The download-style icon opens Import shared map, which loads a .ltdmap file. It replaces every ground tile and clears all decorative objects before placing the new ones. Houses, facilities, and UGC objects on your map are kept as-is.
Export PNG
Section titled “Export PNG”The export menu has an Export PNG option. Pick the resolution (1× to 8×), choose which layers to bake in, pick a background (dark, light, transparent), then download.
Keyboard shortcuts
Section titled “Keyboard shortcuts”The ? button on the right of the toolbar opens the full shortcuts dialog.
Advanced
Section titled “Advanced”The Advanced sub-tab is the raw entry browser for Map.sav. Every leaf in the file is listed and editable here, including the ones the workbench doesn’t expose.